Followers

Wednesday, August 26, 2015

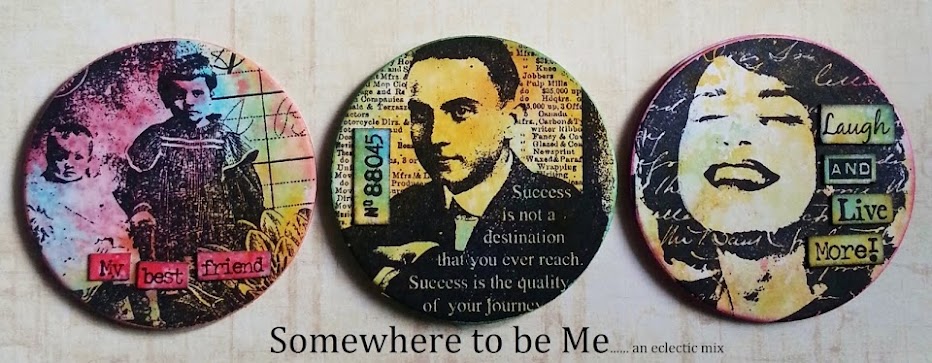
Huckleberry Finn Coasters

I was given some old coasters last year, about 12 square ones and 6 round ones. I put them away and totally forgot about them until yesterday, when I found them while looking for something else.
I took 4 of the round ones and decided to recycle them in to new coasters for my craft room.


I lightly sanded them down, glued on some strips of book paper then painted them with gesso. When they were dry, I splodged on some red and blue acrylic paint and kind of smudged it about with a baby wipe. Once that was completely dry, I gave them another light coat of gesso.
At this point the picture in my mind's eye of how these coasters would look completely changed...we've all had that, haven't we?
It was while I was waiting for the paint to dry,that I was looking through all my Artistic Outpost Stamps...keeping the Huckleberry Finn set to one side, with the idea that I would stamp my coasters with them.
This is where I hit a snag, the strips of book paper had caused slight ridges on the surface of the coasters, so I wasn't sure I would be able to stamp a clear enough image...but quickly decided to go for it anyway and take a chance.
All the images stamped pretty well, some parts I coloured with water colour pencils, then I sprayed all 4 coasters with seal and shine, I didn't want to disturb the pencil colours with the moisture from mod podge.

(click image to enlarge it)

Once the spray and shine was completely dry I realised that I would need a thicker coating on the surface, so I decided I would heat emboss with clear embossing powder.

(click image to enlarge it)

As I was heat embossing the coasters, I could still see the ridges from the paper, but I thought it added interest to the coaster, overall I love the look of  them as they now look like round shiny tiles!

(click image to enlarge it)

I heat embossed each coaster twice,then set aside some embossing powder and added a light sprinkle of very fine glitter....then using that I heat embossed them for the third time.
This set of coasters I am using to enter the challenge over at 


Thursday, August 20, 2015

Little Cherub

I was so pleased to be asked to be Tagalong's guest designer this week...such a lovely challenge blog and just for Tags...
The theme I have chosen is "Cherubs"


I am hoping my theme will prove popular...I just adore these vintage cherubs, they are so cute...
So if you fancy a challenge, why not make a Tag using the Cherub theme and pop along to the 

Friday, August 14, 2015

Humphry & Ingrid

Casablanca, probably one of the most iconic films ever made and once seen you can never for get it.
So I have chosen these stamps for my challenge over at the Tagalong
The theme there this week is Paris....


Where better to have a romance than Paris....oh,la,la...
If you fancy making a Paris themed Tag, why not enter it in to the challenge here at
                            Tagalong Challenge

Monday, August 10, 2015

Altered Matchbox

Over at Rubber Dance Stamps,they have launched their August challenge...a fab "Colour" theme too.
I had a couple of MDF match boxes that I bought from Fernli Designs and they are really nice...so I decided to alter one for the challenge.....


I coloured some art card in distress inks, cut them, then glued them to my matchbox.
I also covered the front of the drawer and added beads for the handle.


Using the set called "Take the Plunge" I stamped the images.....stamping an extra image of the lady on some spare card, which I coloured and overlaid on the image on the box.
At this stage I used a spray and shine sealer over the whole matchbox and it really added a sparkle and enhanced the colours.


I added the trims to the top and then lined the base of the drawer, adding a seed packet tied with raffia.


To finished I used glossy accents on the lady's hair and clothes...unfortunately the light really wasn't in my favour and the accents are not showing that well....
So if you fancy a "Colour Challenge" why not pop over to this lovely blog....


Sunday, August 9, 2015

Artist Trading Block

I am in a swap group on facebook and signed up for the Atb swap. I used to use solid wood from my Atbs,but now I have found a lovely company called Fernli Designs that make them in several different sizes. They are made from MDF and slot and glue together easily to make a perfect cube/block.
The swap was to decorate a 4inch block...and this is mine that I made for my swap partner....


I covered all six sides in dark thick card with book binding glue and left to dry over night...then using the gorgeous Graphic45 papers I again cover all six sides.
From the scraps,I cut the labels and images and added them to the block along with some brass elements and the bottles.


I added 4 mini cotton reels for the feet before decorating the top with labels and other embellishments.
I distressed around all the edges with walnut stain distress ink.
My swap partner received this a week or so ago,so I am able to show it now without spoiling her surprise...now I am waiting for hers....looking forward to that arriving sometime soon....


Friday, August 7, 2015

100th Challenge

Wow...Tagalong has reached it's 100th challenge....
Congratulations to Mandy Chilvers and her team for providing a fab challenge each week.


Here's my Tag

The Tagalong Challenge has an Anything Goes theme this week....why not pop over and enter your Tag...
The challenge is here....Tagalong Challenge


Thursday, August 6, 2015

Be Still My Heart

I have been thinking that maybe my digital "Haunting" designs weren't really the right subject for the challenge over at Dream in Darkness.....compared to some of the stunning entries over there.
But I have decided to enter again this month with this design...


I do enjoy creating digitally, still not that good at it,but I am happy with my results.
This lady is a freebie vintage image and the background is from a photo that I have been given permission to use by a friend...
This is rapidly becoming one of my favourite pieces so far, I hope you like it.
You can find the challenge here at.....
                                 Dream in Darkness

Monday, August 3, 2015

Caught on Film.....

I do enjoy making Tags...so I love Mandys Challenge Blog over at Tagalong...every week there is a different theme, this week it's "Caught on Film"
The theme was the perfect excuse for me to have a play with my Picture Star Stamps from Artistic Outpost


I used a piece of film frame in MDF, which is made at Fernli Designs...this I painted in matt black acrylic paint.
The tag was shaded and then I added background images from the stamp set Picture Star by Artistic Outpost.
I masked the face part of the stamp to make the strip to for the film frame.
Finally I stamped a complete image of the child star and added it to the Tag.

So my Tag is for both challenges which you can find below.


Saturday, August 1, 2015

A Little Bit Steam Punky

I found 2 different sized hearts in my alterables stash, made from the same type of wood, so I thought I would use them for my design team project for the August Challenge over at Rhedd's Creative Spirit


First I sealed the wood with black gesso and added some die cut chicken wire.
 I applied some dark acrylic paints, Terracotta, Dark Blue & Grey which I dabbed with a baby wipe to kind of smear the paints a bit.
I did the same for the Cogs.


Once all the paints were dry I assembled the cogs on the largest  heart.
The second heart I wrapped with some copper wire and added a drawer handle, then glued the heart to the larger one on a slight angle.
To finish I very lightly went over some of the cogs and the handle with copper gilding wax...some areas I over applied, but soon wiped the surplus away with a baby wipe.

So if you would like  an Altered Art Challenge this month, why not pop over to
I would love to see you there...xx


Just like my Dads....

My father was a Shipwright  by trade, he started his apprenticeship with Upham's Shipyard in our local town, sadly the ship yard was pulled down many years ago, he finished  his apprenticeship  through his army career in the R.E.M.E. ( Royal Electrical & Mechanical Engineers)
He always had a love of wood and a lot of that has rubbed off on me, I just can't get enough of the smell sometimes, wierd I know,lol
As a young child I spent many weekends and early evenings in my dad's workshop and I will always remember the little box of tricks, as he called it, on the shelf.
To this day I have no idea where it disappeared too...after he passed away 3 yrs ago I had hoped I would find it among his belongings, but I never did.
So this box I have made as a tribute to my dad.....perfect for my design team piece for Altered Eclectics Challenge this month.


  A basic wooden box that I gessoed then painted in Mocha acrylic paint....once dry I distressed the edges.


I stamped some images on the lid as well as adding the embellishment.


Although the contents of this box is not exactly what my dad kept in his, I do know he had stamps, shells and a few tickets and passport style photos of some of his friends from years gone by, a few buckles, which came from mine and my sister's sandals. Also a collar stud that was his fathers...funny what memories stay with you...just wish I could have found his little box....


Hope to see you over at the challenge blog...as always it is Anything Goes, so long as your entry is Altered Art....the challenge is here....Altered Eclectics Challenge